What Makes The Sonerai Such a Great Plane to Own and Fly.
The Sonerai is a fantastic little airplane to own and fly because the initial cost to buy it, is so inexpensive. You can purchase one of these little beauties for around $10,000 fairly easy. They are cheap to maintain as well, you can go to any Volkswagen shop for engine parts. You can also share a hanger with someone and cut your cost in half. These days, that is worth a lot to pilots who are on a tight budget.
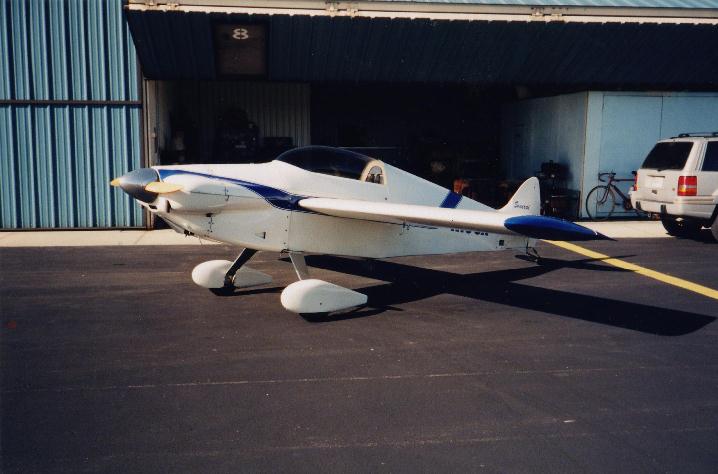
Picture of my Sonerai II Mid Wing Version.
When my Father & I went flying we always had a great time just flying around enjoying the view, and bouncing from airport to airport. On many occasions we would pull up and do some aileron rolls, what a ball that was! Or we would head up to Anderson field for some Popcorn. Other times we would fly up to Elwood Airport and have lunch at Roxie's Cafe located their on the field. There was a North/South and East/West grass runway to choose from when landing, then head in for some great food!! Most of the time you would see planes of every type parked all around the Restaurant.

This is a picture of my Sonerai II with an 1835cc VW Engine.
The two engines that were most popular on the this plane were the 1835cc And 2180cc VW engine. My plane used the 1835 VW engine which was 65 hp. With that engine my cruise speed was 125mph with a top speed of 140 mph straight and level. One day I went out and climbed up to 10,000 feet, it took me about 45 minutes. That was about a 250 foot per minute climb rate. But I was not a small guy, I weighed about 180lbs. You learn quick, after takeoff climb to about 2500 feet and open it up to full throttle 140mph.
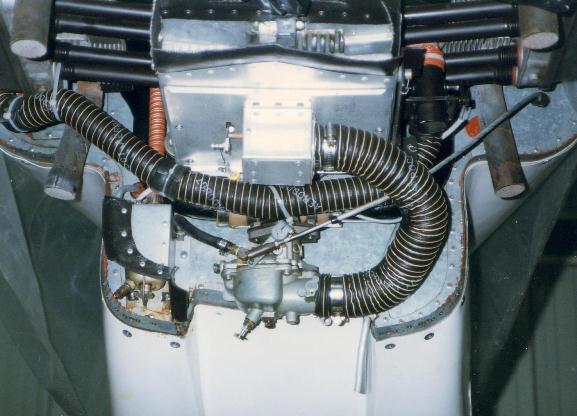
This is the of Sonerai II 1835cc Engine With Zenith Carburetor.
One of the things I loved most about this plane was that it did not require a lot of work. After flying 20 hours, I would change the oil, and adjust the valves then look the engine over real good. All most every time I adjusted the valves, they were tight, and had to be loosened. After finishing up under the cowl, I would check the pressure on all the tires, check the brake fluid level then give the plane a really good inspection.
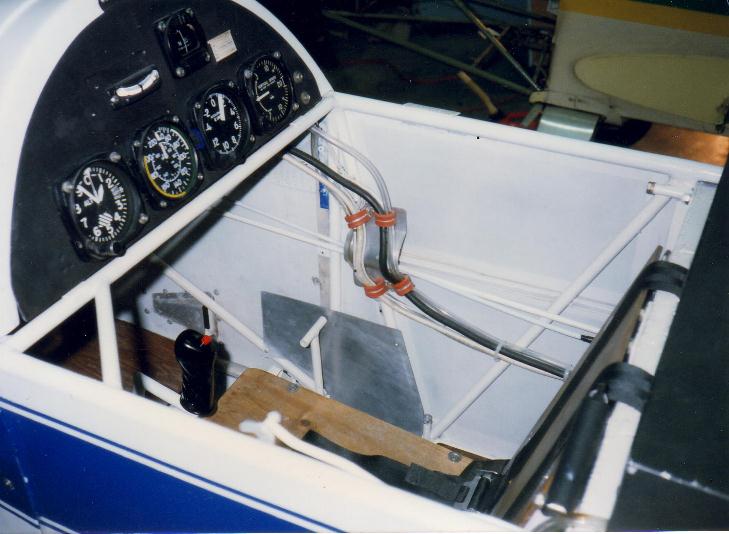
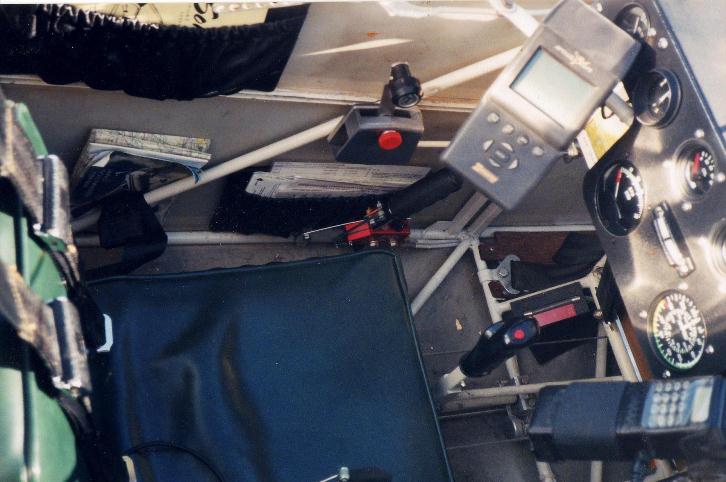
Front Cockpit View of my Sonerai II Mid Wing.
When I first acquired this plane it had Mechanical Brakes installed on it. During a landing at one of the local airports, the left wheel brake locked up. This caused the plane on landing to skid side ways, buckling the right side gear and breaking one of the lower pieces of the fuselage. This took me about 6 months to repair, and when done the mechanical brakes were gone and replaced with hydraulic Brakes. I just bought a Go Cart brake system which worked great. I also replaced both front and rear throttle quadrants and made many other improvements while the plane was down for repair.
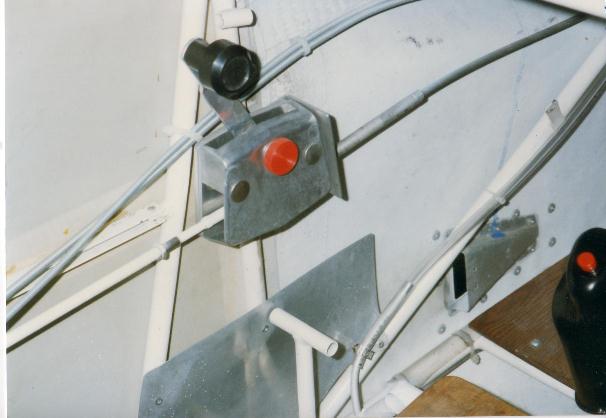
Throttle Quadrant in the Front Cockpit of my Sonerai II Mid Wing.
This Plane comes in many different versions to soot any pilots needs, large and small. (Single seat Formula V Racer), (Two Seat Mid Wing), (Two Seat Low Wing), (Two Seat Low Wing Tricycle), (Two Seat Low Wing Stretch Fuselage) and the (Two Seat Low Wing Stretch Tricycle Gear.) As you can see this is a very versatile design that comes in many different options for the pilot. These are very simple planes to fly, just make sure the gear is straight or watch out, they will become monsters. But in all fairness, any tail dragger with gear that is not straight, can be a hand full!!
This was the Rear Cockpit of my Sonerai II Mid Wing
Among some of the things I added to this plane were an Apollo 920 GPS and a hand held Icom Nav/Com radio with Intercom. This made a huge difference on the communication between pilot and passenger. Without an intercom it was almost imposable to hear one another over the engine noise. I made brackets that clamped on to the aircraft frame on both sides which held the Radio and GPS in place just perfect. During the entire four years I owned this plane the radio was crystal clear and never gave me any problems what so ever. Same thing for the Apollo Gps, it worked great as well.
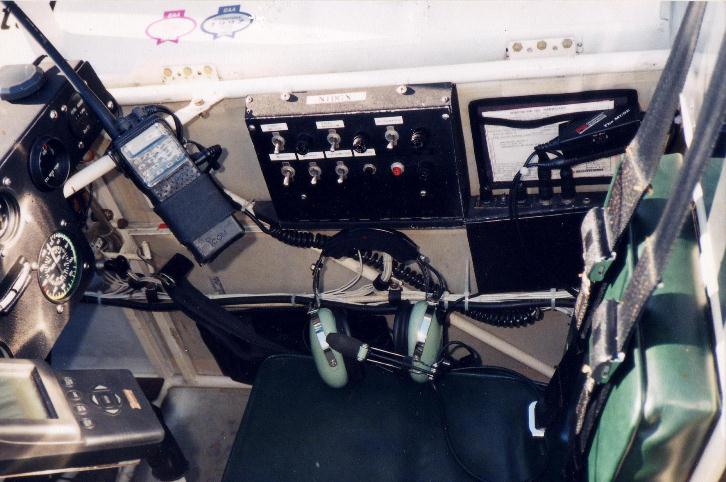
Another View of my Rear Cockpit in a Sonerai II Mid Wing.
On the picture below a friend and I decided that we needed to do a wing mod on the main spar because of the aerobatics I planned on doing with the plane. The first wing took about two weeks to complete and the second wing took me about 4 days. You do indeed get quite a bit more proficient when doing the same thing twice. On the pictures below you will see what it started out looking like. The second pic will show you what it looked like when complete, and the third pic is just a close up of the some of the work.
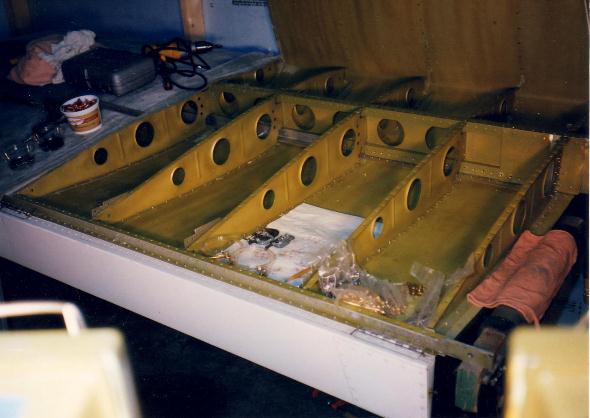
Sonerai II wing opened up to install a wing mod for Main Spar.
All the rivets were drilled out and the holes over sized, then bolts were installed and torqued to spec. We spent about about two hours per night for a week cutting and bending the material up for both wings. You can tell by the picture it beefed the wing up quite a bit. I have no regrets in doing this because it made the wings a lot safer to handle the forces imposed by aerobatics. On the picture above you can see the spar mod was installed to the inboard section of the wing, about 4 foot 6 inches in. It took me about one hour to drill all the rivets out of the wing skin and open it.

View two of main spar wing mod on a Sonerai II plane.
While inside the wing I replaced the old airspeed pitot tube with a new one I made, along with all new tubing. Then carefully inspected the rest of the wing for any loose rivets or damage. After finding no damage I carefully vacumed all the shavings and old rivets, then cleaned it. Once dry I took some Zinc Chromate and sprayed the whole area to prevent any future corrosion that might occur. Then had my friend Jon who was an A&P mechanic look everything over. Once he was done, I proceeded to cleko the wing skin down to hold it in place then started installing the rivets that attached the wing skin to the individual ribs.
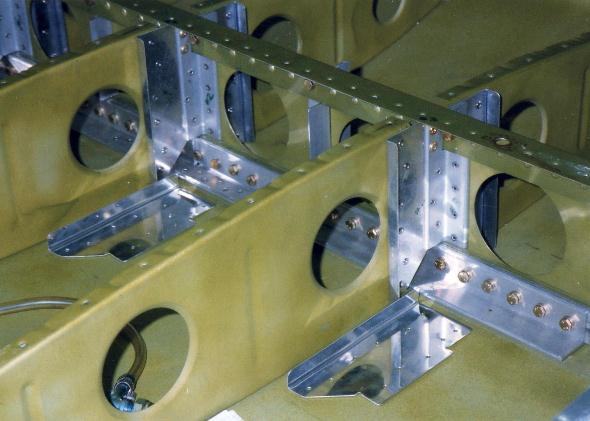
View three of a main spar wing mod on a Sonerai II plane.
The picture above is just a close up view of the aluminum pieces that were installed in the wing to reinforce the Main spar. Once you new where everything went you then clamped it into place. Then drilled about 3 holes on the top, bottom and middle then inserted clekos which hold two pieces of metal together untill you can replace the clekos with rivets in place to hold it then riveted it in place. Once everything was complete the wings were ready to be reinstalled and the job would be complete.
Thanks
for flying in to see whats new with "Sonerai", feel free to Bookmark this page and fly-by from
time to time and see
whats new. As always, stay safe and Happy Flying!!
Return From Sonerai to Kit Planes